이번에는 GSAP 라이브러리에서 그래픽 소스가 선을 따라가도록 만들어주는 애니메이션 기능을 소개하겠습니다.
들어가기 전에 데모를 보고 어떤 애니메이션이 가능한지 체크해보세요.

SVG란?

SVG는 벡터 이미지 파일입니다. 위처럼 코드 형식으로도 표현할 수 있습니다. 여러분은 따라갈 패스를 만들거나 그려질 패스를 표현할 때 SVG를 이용하게 됩니다. 그 밖의 벡터 그래픽 소스도 물론 가능합니다.
GSAP는 스크롤 양과 SVG 데이터를 연관지어줍니다. 우리는 GSAP의 몇 가지 플러그인을 이용해 다양한 효과를 구현할 수 있습니다. 이 포스팅에서는 스크롤하면 따라가는 애니메이션을 구현해 보겠습니다.
GSAP 플러그인 불러오기
패스팔로잉 애니메이션을 구현하기 위해서 몇 개의 플러그인을 불러와야 합니다. 헤드 태그 안에 필요한 플러그인을cdn을 이용해 불러올 것입니다. 그린삭 공식 페이지에서 최신 버전을 얻을 수 있습니다
cdn 사용방법은 매우 간단합니다. 스크립트 라인을 붙여넣기만 하면 해당 라이브러리가 불러와집니다. 첨부한 html 코드를 그대로 쓰셔도 버전이 지원 중단되지만 않는다면 데모를 실행시키는 데 문제는 없을 것입니다.
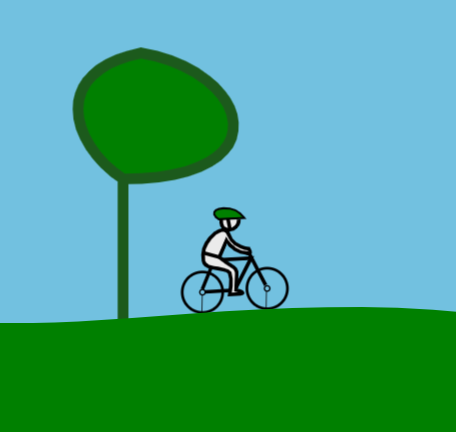
실행해 볼 데모입니다.
mikel의 자전거 작품
html
<html>
<head>
  <link href="style.css" rel="stylesheet" type="text/css" />
  <script src="https://cdnjs.cloudflare.com/ajax/libs/gsap/3.10.4/gsap.min.js"></script>
  <script src="https://cdnjs.cloudflare.com/ajax/libs/gsap/3.10.4/ScrollTrigger.min.js"></script>
  <script src="https://cdnjs.cloudflare.com/ajax/libs/gsap/3.10.4/MotionPathPlugin.min.js"></script>
</head>

<body>
  <div id="scrollDist"></div>
  <div id="container">
    <svg id="route" viewBox="0 50 3000 600">
      <g id="tree">
        <path class="tree" d="M 50 100 C 20 80 10 40 60 30 C 120 40 140 100 50 100 L 50 180" />
      </g>

      <use transform="translate(600,50)  scale(0.8)" href="#tree" />
      <use transform="translate(1200,25)  scale(0.8)" href="#tree" />
      <use id="tree04" transform="translate(2000,-50)  scale(1.1)" href="#tree" />
      <use id="tree05" transform="translate(2200,0)  scale(1)" href="#tree" />
      <use transform="translate(3010,100)  scale(0.8)" href="#tree" />

      <g id="guy" transform="translate(-16.908 101.924) scale(.15)">
        <path d="M345.038 160c-10.853 56.475 63.919 51.44 64.962 4.955" fill="#ebebeb" stroke="#000"
          stroke-width="13.33" />

        <g class="rad">
          <circle cx="260" cy="426" r="75" fill="none" stroke="black" stroke-width="10" />
          <circle cx="260" cy="426" r="10" fill="none" stroke="black" stroke-width="5" />

          <path d="M 250 422 L 185 400" stroke="black" stroke-width="3" />
        </g>
        <g class="rad">
          <circle cx="500" cy="426" r="75" fill="none" stroke="black" stroke-width="10" />
          <circle cx="500" cy="426" r="10" fill="none" stroke="black" stroke-width="5" />
          <path d="M 490 420 L 430 400" stroke="black" stroke-width="3" />
        </g>

        <path d="M270 425h110l67-115H310l-50 105" fill="none" stroke="#000" stroke-width="13.33"
          stroke-linecap="butt" />
        <path d="M440 290l55 123" fill="none" stroke="#000" stroke-width="13.33" stroke-linecap="butt" />
        <path
          d="M320 210c28.865-15.119 43.916-12.855 50 10 5.308 19.94 21.148 35.799 40 45 4.328 2.112 19.495 8.956 30 10 7.348 11.768 9.233 24.578-10 15-27.597-1.495-55.713-23.294-70-50l-30 60c14.819 14.311 31.427 27.676 50 40 2.199 1.891 14.145 9.426 10 30l-5 55 15 5c10.114 3.649 12.603 9.521 0 10h-40c7.21-27.894 11.5-54.439 5-80-14.994-24.682-91.176-12.316-95-50-3.835-37.791 10.071-70.107 50-100z"
          fill="#ebebeb" stroke="#000" stroke-width="13.33" />
        <path d="M440 160c-17.141-24.638-37.736-39.381-80-40-40.544-.594-51.028 20.679-20 40h100z" fill="green"
          stroke="#000" stroke-width="8" transform="matrix(.93186 0 0 .9997 19.981 .049)" />
        <path d="M370 160l5.317 40" fill="none" stroke="#000" stroke-width="13.33" />
        <path d="M270 280l60 20" fill="none" stroke="#000" stroke-width="13.33" stroke-linecap="butt" />
      </g>
      <path id="path"
        d="M -300 180 L 0 180 c 60 0 180 -20 280 0 40 10 130 11.853 200 0 135 -23 240 -5 340 20 235 50 330 -32 460 -40 110 -8 310 30 330 30 120 20 290 15 350 -30 55 -40 210 -10 300 20 50 15 180 15 260 0 120 -20 180 -30 240 20 40 30 85 25 120 25 40 -0 140 -0 180 0 "
        fill="none" stroke="none" />
      <path
        d="M -350 180 L 0 180 c 60 0 180 -20 280 0 40 10 130 11.853 200 0 135 -23 240 -5 340 20 235 50 330 -32 460 -40 110 -8 310 30 330 30 120 20 290 15 350 -30 55 -40 210 -10 300 20 50 15 180 15 260 0 120 -20 180 -30 240 20 40 30 85 25 120 25 40 -0 140 -0 180 0 L 3000 600 L -350 600"
        fill="green" stroke="none" />

      <path d="M 3000 225 L 4000 225 L 4000 600 L 3000 600" fill="green" stroke="none" />
    </svg>

    <script src="script.js"></script>
  </div>
</body>
</html>
CSS
데모를 분석하기 전에 작품을 다 불러와봅시다. 위의 html 코드를 저장하셨다면 style.css 파일도 만들어서 한 폴더에 저장하세요.
body {
    margin: 0;
    background-color: #72c1e0;
}

#container {
    visibility: hidden;
    margin-top: 30vh;
}

#route {
    position: absolute;
    width: 500vw;
    overflow: visible;
}

.tree {
    fill: green;
    stroke: #1c5a1c;
    stroke-width: 6;
}
JavaScript
script.js 파일을 생성해줍니다.여기서 GSAP가 동작할 것입니다. 패스팔로잉 애니메이션 내용이 모두 담겨 있습니다.
console.clear();
// set initial states
gsap.set("#guy", {
scaleX: 0.15
});
var wh = window.innerHeight,
speed = 20,
scrollDist = wh * speed,
scrollEnd = wh * (speed - 1),
route = document.getElementById('route'),
routeWidth = route.getBoundingClientRect().width;
console.log(routeWidth);
gsap.set('#scrollDist', {
width: '100%',
height: scrollDist
})
gsap.set('#container', {
position: 'fixed',
width: routeWidth,
left: 200,
top: 0,
autoAlpha: 1
})
//tween the svg path + cyclist + wheels
gsap.timeline({
defaults: {
duration: 1,
ease: 'none'
},
scrollTrigger: {
trigger: '#scrollDist',
start: 'top top',
end: '+=' + scrollEnd,
scrub: 0.3,
onUpdate: (self) => {
gsap.set('#container', {
x: -routeWidth * (self.progress)
});
gsap.set('.rad', {
rotation: () => self.direction === 1 ? 360 * 30 * (self.progress) : -360 * 30 * (self.progress),
transformOrigin: 'center',
overwrite: 'auto'
})
gsap.to("#guy", {
scaleX: () => self.direction === 1 ? 0.15 : -0.15,
overwrite: 'auto',
duration: 0.2
});
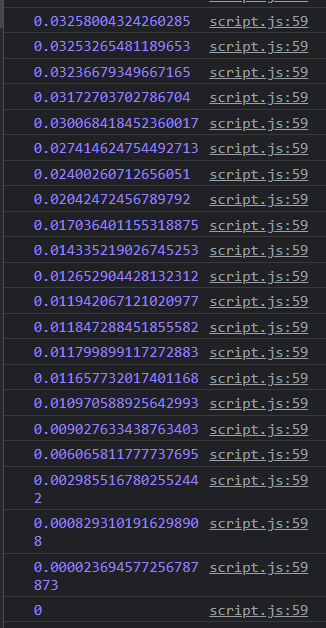
console.log(self.progress) // info for position
},
}
})
.to('#guy', {
motionPath: {
path: "#path",
align: "#path",
alignOrigin: [0.5, 1],
autoRotate: true,
start: 0.1
}
})
.to('#tree04', {
rotation: 20,
transformOrigin: 'center bottom',
duration: 0.01,
repeat: 1,
yoyo: true
}, 0.665)
.to('#tree05', {
rotation: -20,
transformOrigin: 'center bottom',
duration: 0.01,
repeat: 1,
yoyo: true
}, 0.665)
window.onresize = () => {
gsap.set('#container', {
left: 200
});
routeWidth = route.getBoundingClientRect().width;
ScrollTrigger.refresh()
}
VSCode Live Server
프리뷰를 실행해서 결과를 확인해봅시다. 라이브 서버를 이용해 cdn에 접속하여 웹페이지를 로드합니다.
[Tips] Live Server 비주얼 스튜디오 코드 라이브 서버 설정
비주얼 스튜디오 코드 라이브 서버 설정하는 과정을 순서대로 알려드리겠습니다. 라이브 서버란? 이 확장을 VSCode에 설치하면 웹사이트를 개발하면서 브라우저에서 바로 프리뷰를 확인할 수 있
ifhead.tistory.com
스크립트 살펴보기
콘솔 청소
console.clear()는 가능한 경우, 콘솔에 기록된 메시지를 모두 지웁니다.
애니메이팅
gsap.set
이동 시간 없이 즉시 이동
gsap.to
가장 일반적인 유형의 애니메이션은 목적지 값을 정의할 수 있도록 하는 to() 트윈입니다
애니메이션 경로 관리
var wh = window.innerHeight,
    speed = 20,
    scrollDist = wh * speed,
    scrollEnd = wh * (speed - 1),
    route = document.getElementById('route'),
    routeWidth = route.getBoundingClientRect().width;
console.log(routeWidth);

window.onresize = () => {
    gsap.set('#container', {
        left: 200
    });
    routeWidth = route.getBoundingClientRect().width;
    ScrollTrigger.refresh()
}
화면 사이즈에 따라 전체 경로의 길이가 바뀌는데, 그냥 놔두면 기대한 대로 동작하지 않을 것입니다. 애니메이션이 망가지는 것입니다. 그래서 페이지가 리사이징 될 때마다 애니메이션의 지표 값들을 바꾸어주고 있습니다.
'Web' 카테고리의 다른 글
| [Web] 미디어 쿼리 기기별 해상도 분기점 (0) | 2022.09.01 |
|---|---|
| [Web] 미디어 쿼리로 반응형 웹사이트 구현 (0) | 2022.09.01 |
| [Web] 투명도가 있는 애니메이션 포맷 고르기 (0) | 2022.08.30 |
| [Web] p5.js 스케치 성능 최적화 방법으로 프레임레이트 높이기 (0) | 2022.08.26 |
| [Web] GSAP 메소드 매개변수와 효과의 종류 (0) | 2022.08.26 |


댓글